After explaining how to turn an LED on and off continuously on an Arduino, now I will show how to connect a common-cathode 7-segment display.
The display will count up from 1 to 9, then go to the value 0 and count again from 1 to 9, at 1-second intervals.
Requirements:
- Arduino Uno.
- Breadboard.
- Wires.
- Common-cathode 7-segment display.
- 220 Ohm resistor.
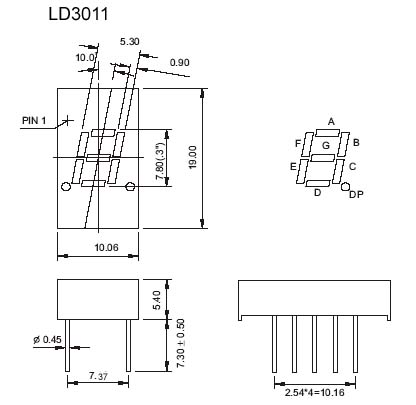
The following figure shows the identification of the LEDs of the 7-segment display:
The wiring diagram is the following:
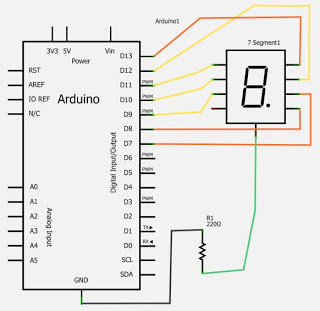
Connections:
- Pin a - Digital 7
- Pin b - Digital 8
- Pin c - Digital 9
- Pin d - Digital 10
- Pin e - Digital 11
- Pin f - Digital 12
- Pin g - Digital 13
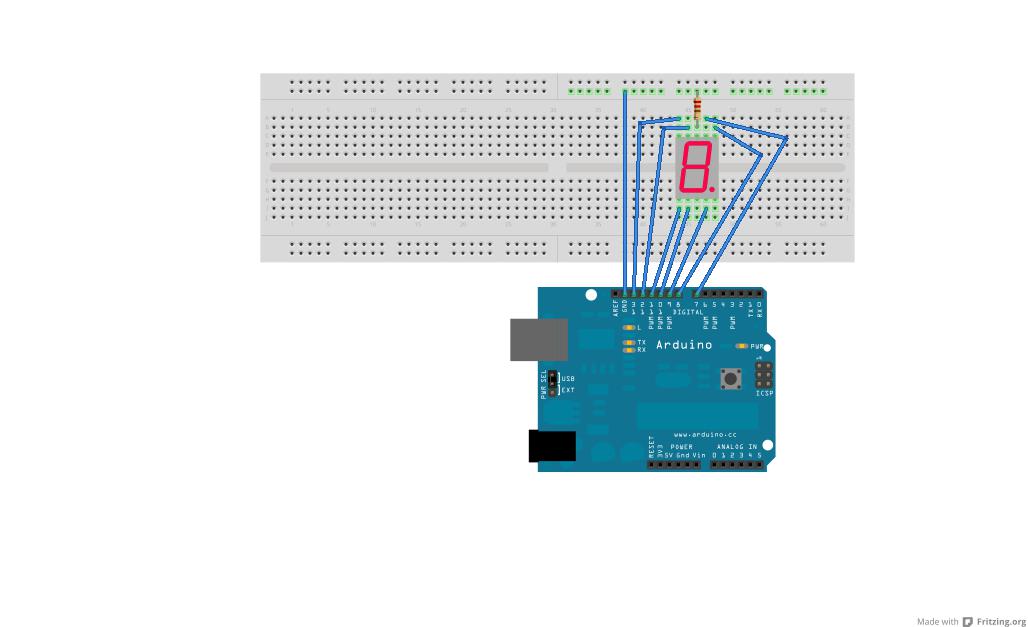
The following figure shows the circuit assembly:
The program code is shown below:
int pausa=1000; // define la pausa entre cada digito


#Se definen los Pines de salida al display 7 segmentos

void setup()

{

  pinMode(7, OUTPUT);

  pinMode(8, OUTPUT);

  pinMode(9, OUTPUT);

  pinMode(10, OUTPUT);

  pinMode(11, OUTPUT);

  pinMode(12, OUTPUT);

  pinMode(13, OUTPUT);

}


//Se define la funcion display que recibe 7

//variables y se asignan a cada una de sus salidas

void display (int a, int b, int c, int d, int e, int f, int g)

// Funcion del display

{

  digitalWrite (7,a);

  digitalWrite (8,b);

  digitalWrite (9,c);

  digitalWrite (10,d);

  digitalWrite (11,e);

  digitalWrite (12,f);

  digitalWrite (13,g);

}


//Funcion principal que genera un lazo continuo

void loop()

// Dependiendo de cada dígito, se envía a la función display

// los estados (0 y 1) a cada uno de los segmentos

{

  display (1,1,1,1,1,1,0); //escribe 0

  delay(pausa);

  display (0,1,1,0,0,0,0); //escribe 1

  delay(pausa);

  display (1,1,0,1,1,0,1); //escribe 2

  delay(pausa);

  display (1,1,1,1,0,0,1); //escribe 3

  delay(pausa);

  display (0,1,1,0,0,1,1); //escribe 4

  delay(pausa);

  display (1,0,1,1,0,1,1); //escribe 5

  delay(pausa);

  display (1,0,1,1,1,1,1); //escribe 6

  delay(pausa);

  display (1,1,1,0,0,0,0); //escribe 7

  delay(pausa);

  display (1,1,1,1,1,1,1); //escribe 8

  delay(pausa);

  display (1,1,1,0,0,1,1); //escribe 9

  delay(pausa);

}
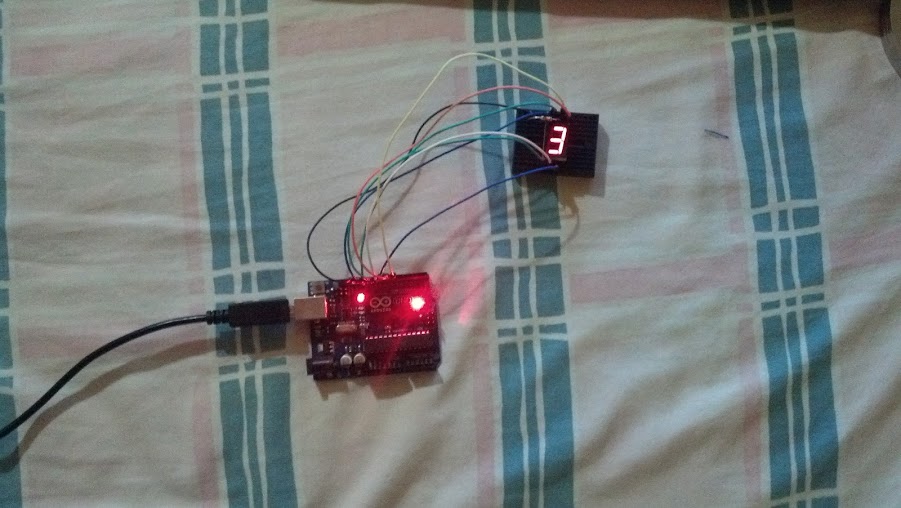
The following figure shows the connection:
To finish, here is a video of the counter working:
Make a donation! If you liked the article you can make a donation with Bitcoin (BTC) using the digital wallet of your choice to the following address: 17MtNybhdkA9GV3UNS6BTwPcuhjXoPrSzV
Or by scanning the QR code from your wallet: