In 2012, concerned about the slowness and security of DNS query communications, I wrote an article about DNSCrypt.
This article is based on the article Checking that DNSCrypt works correctly and encrypts traffic .
Back then, installation was done by downloading a .deb file, but in Debian Stretch it is already included in the repositories, so installing it only takes a simple apt-get.
apt-get install dnscrypt-proxy dnscrypt-proxy-pluginsCheck that DNSCrypt is active:
# systemctl status dnscrypt-proxy.socket
● dnscrypt-proxy.socket - dnscrypt-proxy listening socket
   Loaded: loaded (/lib/systemd/system/dnscrypt-proxy.socket; enabled; vendor preset: enabled)
   Active: active (running) since Sat 2017-06-03 00:26:02 -04; 18h ago
     Docs: man:dnscrypt-proxy(8)
   Listen: 127.0.2.1:53 (Stream)
           127.0.2.1:53 (Datagram)

jun 03 00:26:02 grievous systemd[1]: Listening on dnscrypt-proxy listening socket.
As you can see, DNSCrypt is active; if it is not active, run:
# systemctl start dnscrypt-proxy.socketFor DNSCrypt to start automatically, run:
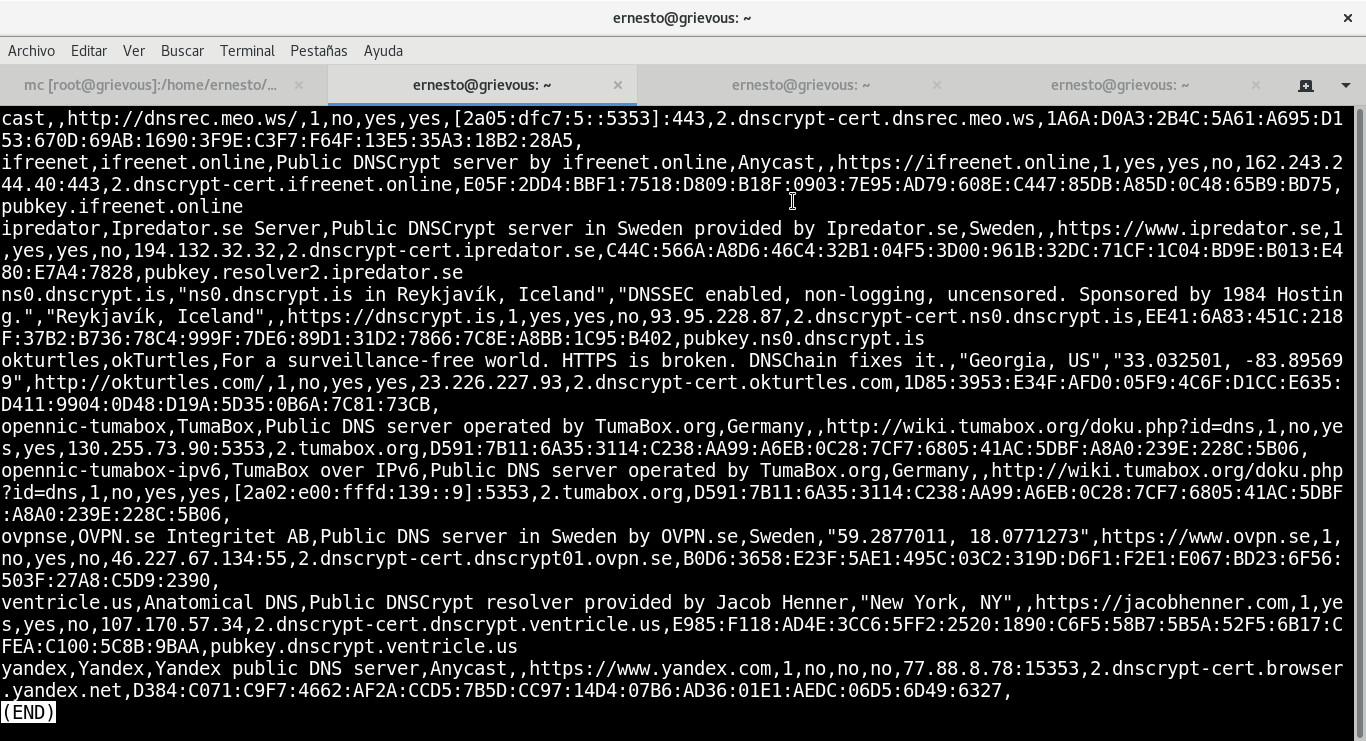
# systemctl enable dnscrypt-proxy.socketYou can see the list of DNSCrypt servers in /usr/share/dnscrypt-proxy/dnscrypt-resolvers.csv . The following image shows some of the contents of the file:
Now check the port and IP that DNSCrypt is using:
# cat /etc/systemd/system/sockets.target.wants/dnscrypt-proxy.socket
[Unit]
Description=dnscrypt-proxy listening socket
Documentation=man:dnscrypt-proxy(8)
Wants=dnscrypt-proxy-resolvconf.service

[Socket]
ListenStream=127.0.2.1:53
ListenDatagram=127.0.2.1:53

[Install]

WantedBy=sockets.target
The IP address DNSCrypt is using is 127.0.2.1 and the port is 53.
This file is modified if you are using SystemD; if you use init.d, modify the file described below.
Edit the file /etc/dnscrypt-proxy/dnscrypt-proxy.conf :
vim /etc/dnscrypt-proxy/dnscrypt-proxy.conf

# cat dnscrypt-proxy.conf
# A more comprehensive example config can be found in
# /usr/share/doc/dnscrypt-proxy/examples/dnscrypt-proxy.conf

ResolverName random
Daemonize yes

# LocalAddress only applies to users of the init script. systemd users must
# change the dnscrypt-proxy.socket file.
LocalAddress 127.0.2.1:53
The random option guarantees that any DNSCrypt server from the aforementioned list will be used.
When the DNSCrypt service comes up, it changes the /etc/resolv.conf configuration so that it uses the IP 127.0.2.1; the contents of the file are shown below
# cat /etc/resolv.conf

# Generated by resolvconf
nameserver 127.0.2.1
After starting the service you can check the syslog log to see whether the service works:
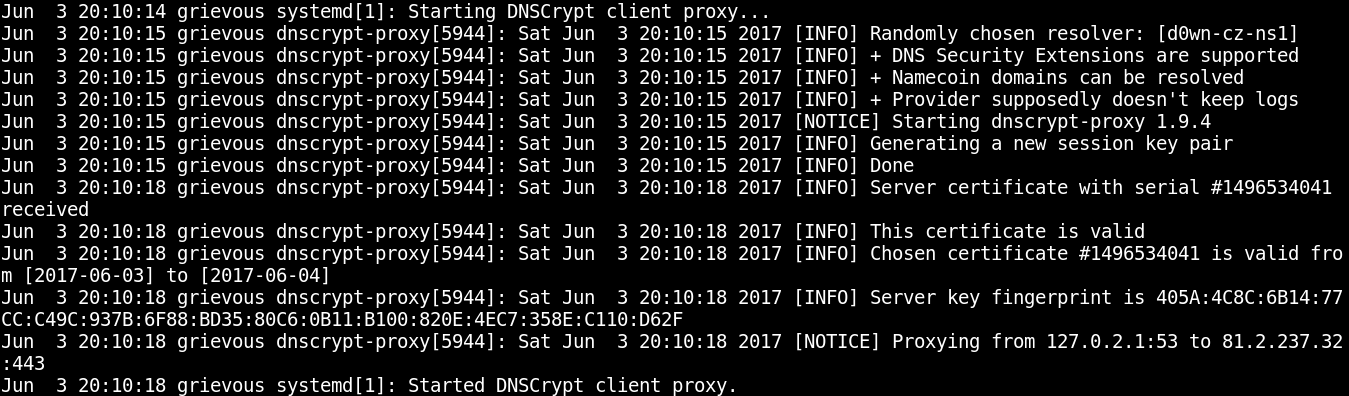
As you can see in the syslog, at the start the service waits for a digital certificate and only then does it start working.
Querying with the host command gives:
host www.google.com
www.google.com has address 216.58.209.68
www.google.com has IPv6 address 2a00:1450:401b:801::2004
Now some query tools will be installed:
apt-get install dnsutils A query is made with the dig command:
dig www.google.com

; <<>> DiG 9.10.3-P4-Debian <<>> www.google.com
;; global options: +cmd
;; Got answer:
;; ->>HEADER<<- opcode: QUERY, status: NOERROR, id: 6930
;; flags: qr rd ra; QUERY: 1, ANSWER: 1, AUTHORITY: 0, ADDITIONAL: 1

;; OPT PSEUDOSECTION:
; EDNS: version: 0, flags:; udp: 4096
;; QUESTION SECTION:
;www.google.com.   IN A

;; ANSWER SECTION:
www.google.com.  7 IN A 216.58.209.68

;; Query time: 266 msec
;; SERVER: 127.0.2.1#53(127.0.2.1)
;; WHEN: Sat Jun 03 20:26:08 -04 2017
;; MSG SIZE  rcvd: 59
To verify that encryption works in DNSCrypt, wireshark-gtk will be used; first install it and then run it:
#apt-get install wireshark wireshark-gtkTo find out the IP of the DNSCrypt server being used, dnsleaktest is used. When the page opens it shows that the machine's IP is in Barquisimeto, Venezuela and the IP is 186.185.180.136.
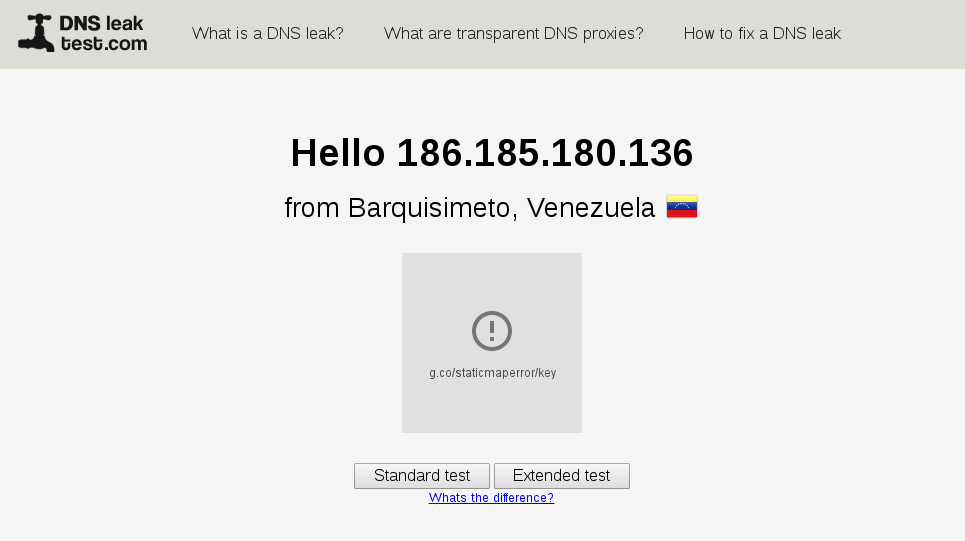
Click standard test:
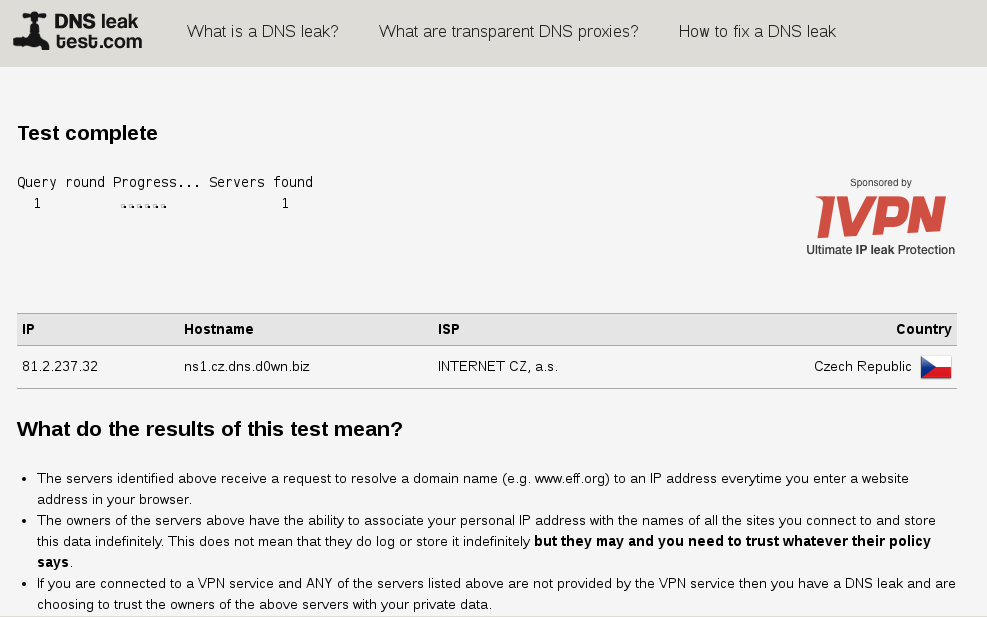
The server IP is 81.2.237.32.
Start wireshark capturing packets on the wlp1s0 interface, which is what wlan0 is now called in Debian Stretch. Start the packet capture and filter on ip.addr == 81.2.237.32. The result is shown below:
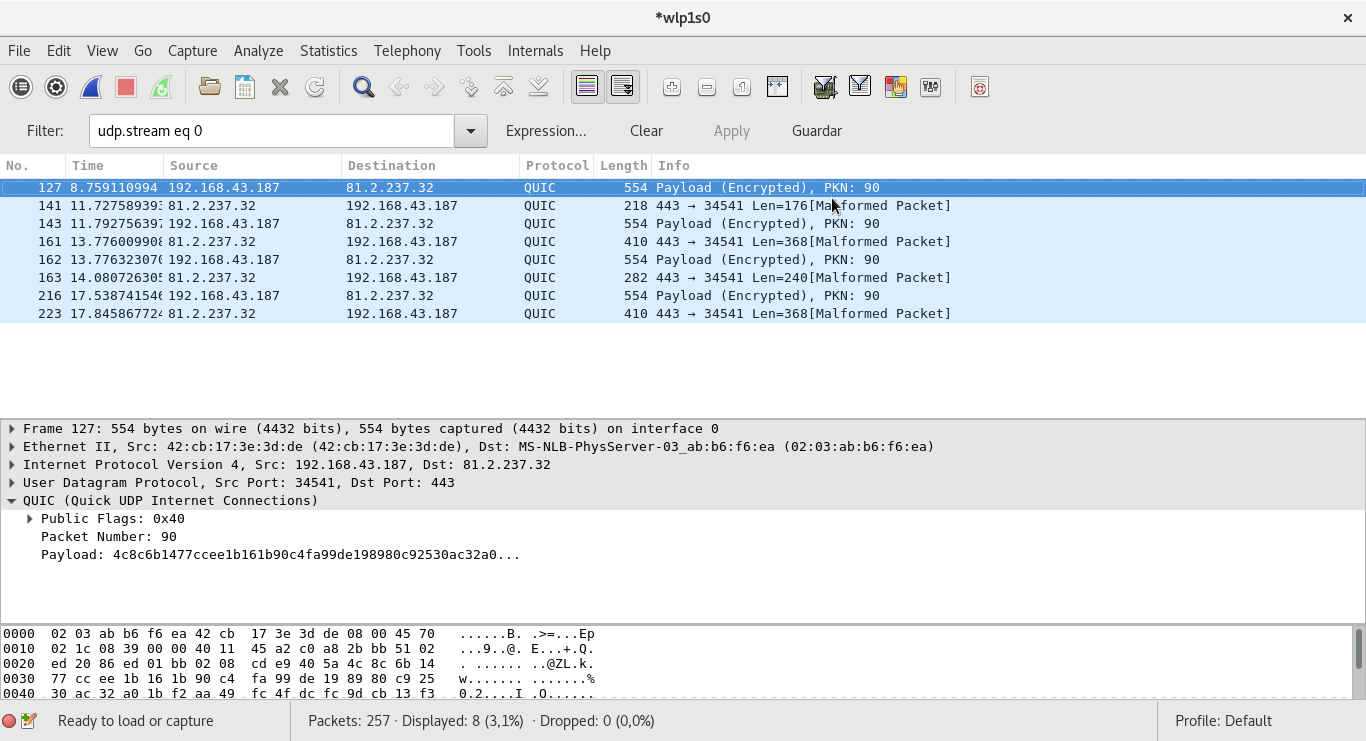
The protocol used in the communication is QUIC, an experimental protocol that encrypts the communication. Select the first packet and right-click it, then click follow udp stream, obtaining what is shown in the following figure:
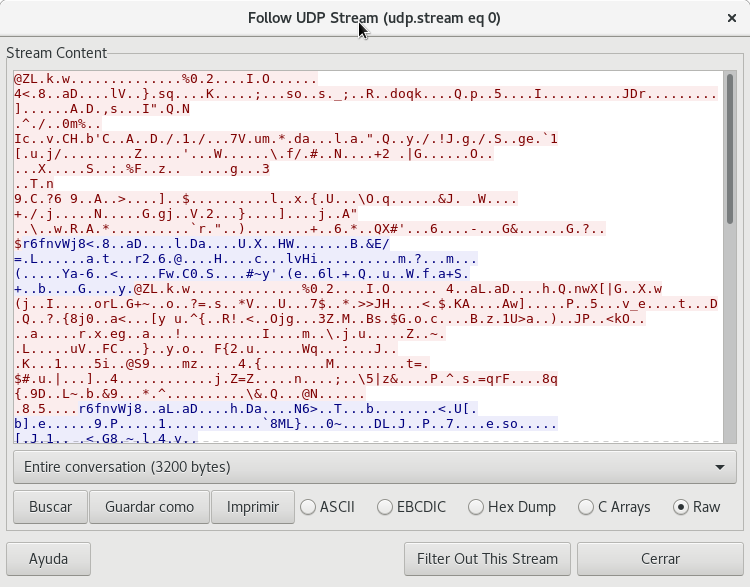
When this action is run, the different packets are reassembled, in this case UDP in raw format, and as you can see the communication does not show any plain text information.
Make a donation! If you liked the article you can make a donation with Bitcoin (BTC) using the digital wallet of your choice to the following address: 17MtNybhdkA9GV3UNS6BTwPcuhjXoPrSzV
Or by scanning the QR code from the wallet: