Continuing with the series of articles about accessing mongodb from Flask.
The previous article makes an initial query to the database.
To review the articles related to this one, see:
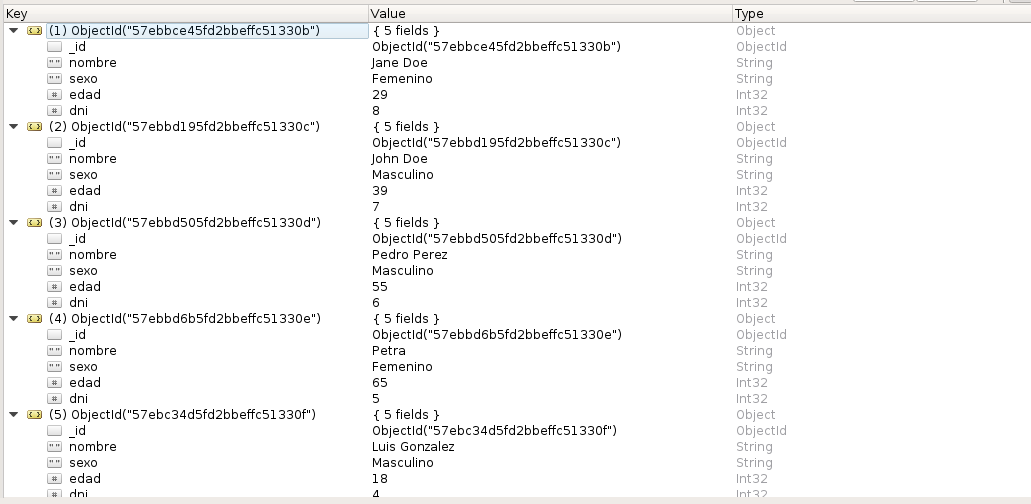
The mongodb database holds the following employee data:
[{"edad": 29, "nombre": "Jane Doe", "dni": 8, "sexo": "Femenino", "_id": {"$oid": "57ebbce45fd2bbeffc51330b"}}, {"edad": 39, "nombre": "John Doe", "dni": 7, "sexo": "Masculino", "_id": {"$oid": "57ebbd195fd2bbeffc51330c"}}, {"edad": 55, "nombre": "Pedro Perez", "dni": 6, "sexo": "Masculino", "_id": {"$oid": "57ebbd505fd2bbeffc51330d"}}, {"edad": 65, "nombre": "Petra", "dni": 5, "sexo": "Femenino", "_id": {"$oid": "57ebbd6b5fd2bbeffc51330e"}}, {"edad": 18, "nombre": "Luis Gonzalez", "dni": 4, "sexo": "Masculino", "_id": {"$oid": "57ebc34d5fd2bbeffc51330f"}}, {"edad": 28, "nombre": "Carolina", "dni": 3, "sexo": "Femenino", "_id": {"$oid": "57ebc3715fd2bbeffc513310"}}, {"edad": 34, "nombre": "Luissana", "dni": 2, "sexo": "Femenino", "_id": {"$oid": "57ebc3935fd2bbeffc513311"}}, {"edad": 43, "nombre": "Neg", "dni": 1, "sexo": "Masculino", "_id": {"$oid": "57ebc4b85fd2bbeffc513312"}}]A field called dni has now been added, and there are 8 employees.
You can see the source code for this article in the mongo2 branch on gitlab.
Directory and file structure
tutorial-flask
├── app
│   └── run.py
├── docker-compose.yml
├── Dockerfile
└── README.md
This is the same structure as in the previous article.
Dockerfile and docker-compose.yml files
These files are the same as in the previous article.
Script app/run.py
This script paginates according to a variable called dni, which will be used to perform the paginated query.
The code of run.py follows:
#!/usr/bin/env python


#Se importa Flask, reqest y jsonify


from flask import Flask, request,jsonify


#Se importa pyMOngo


from flask_pymongo import  PyMongo, pymongo


#Se importa dumps


from bson.json_util import dumps


#Se instancia la clase de Flask, se configura el acceso


#a la base de datos mongodb a empleados


app = Flask(__name__)


app.config['MONGO_DBNAME'] = 'empleados'


app.config['MONGO_URI'] = 'mongodb://mongo:27017/empleados'


#Se asocia la app a pymongo


mongo = PyMongo(app)


#Se define la ruta /dnis con metodo GET


@app.route('/dnis',methods=['GET'])


def dni():


    #Se consutla la coleccion empleados


    empleados = mongo.db.empleados


    #Se toma los argumentos del url offset y limite


    offset = int(request.args['offset'])


    limite = int(request.args['limite'])


    #Se define el decremento como la diferencia entre offset y el limite


    decremento = offset-limite


    #Se define el incremento como la suma entre offset y limite


    incremento = offset+limite


    #Mientras no de error de indice


    try:


        #Se define el dni inicial, el ultimo


        dniInicio = empleados.find().sort('dni',pymongo.ASCENDING)


        dniUltimo = dniInicio[offset]['dni']


        #Se hace la consulta a la base de datos


        empleados  = empleados.find({'dni': {'$gte': dniUltimo}}).sort('dni',pymongo.ASCENDING).limit(limite)


        #Se crea el listado de donde se almacena los diccionarios.


        listado = []


        #Se agrega a listado os dni y nombres de los empleados.


        for i in empleados:


            listado.append({'dni': i['dni'],'nombre': i['nombre']})


        #Se define el url previo y siguiente, donde se juega con el offset para avanzar o regresar


        prev_url = 'http://localhost:5000/dnis?limite=' + str(limite) + '&offset=' + str(decremento)


        next_url = 'http://localhost:5000/dnis?limite=' + str(limite) + '&offset=' + str(incremento)


        #Si decremento es negativo se coloca el url en blanco.


        if  ( decremento <  0) :


            prev_url = ''


        #Se retorna el json con los resultados y los urls.


        return jsonify({'resultado': listado,'prev_url':prev_url,'next_url':next_url })


    except (IndexError,):


        #Si hay error de indice se defin el url siguiente en blanco, el url previo se mantiene.


        next_url = ''


        prev_url = 'http://localhost:5000/dnis?limite=' + str(limite) + '&offset=' + str(decremento)


        #Se retorna un json con el resultado y urls .


        return jsonify({'resultado': 'FIN','prev_url':prev_url,'next_url':'' })


if __name__ == "__main__":


    #Se corre la aplicacion en modo debug


    app.run(host="0.0.0.0",debug=True)
Creating the docker image and running the containers
To create the docker image, run:
docker-compose buildTo run the containers:
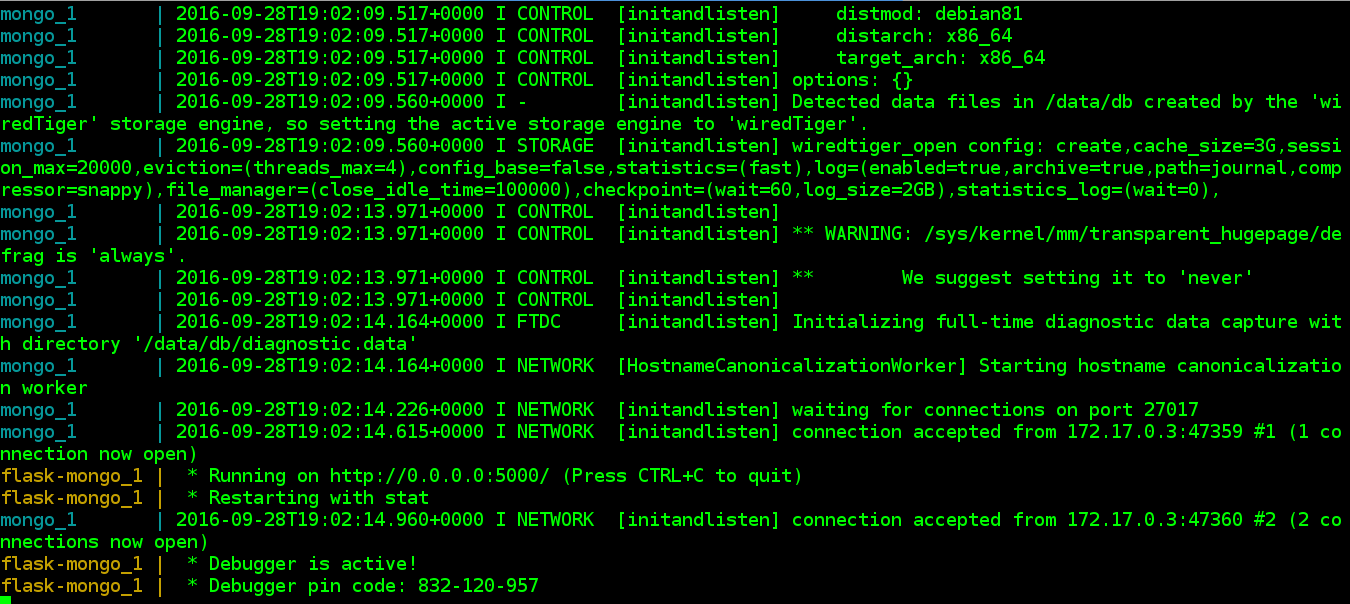
docker-compose upAn image of the execution output is shown below:
The documents are shown below through the robomongo application:
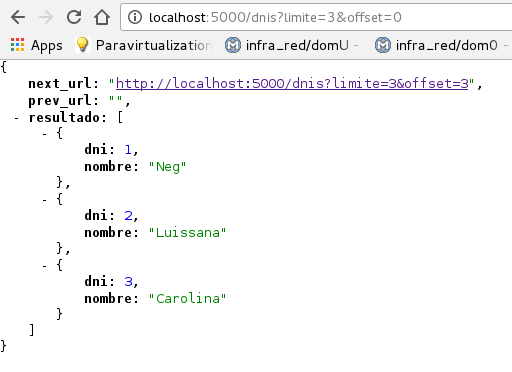
Open the url (http://localhost:5000/dnis?limite=3&offset=0 ), where limite is the number of objects to show per page and offset is the displacement.
The first figure shows the first group of employees (there is no url to go back):
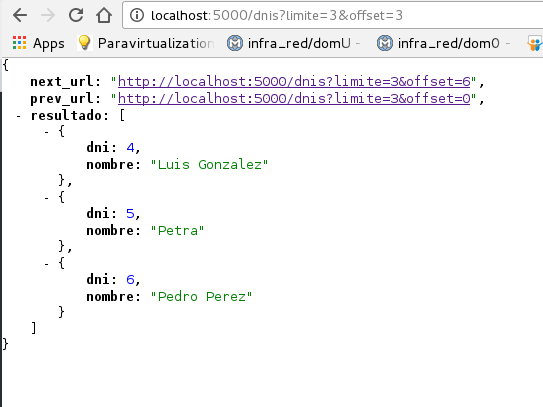
Clicking the next url shows dni 4, 5 and 6 (the urls to go back and forward appear):
Clicking forward shows the employees with dni 7 and 8:
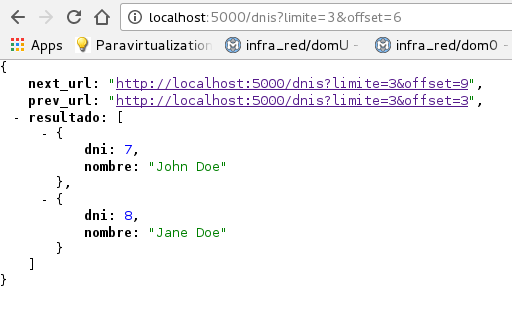
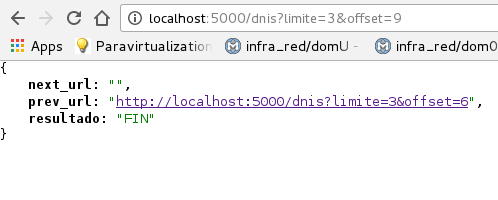
Since there are 8 elements, dni 8 was reached; clicking forward shows that the json has ended and that there is only a link to go back:
Make a donation! If you liked the article you can make a donation with Bitcoin (BTC) using the digital wallet of your choice at the following address: 17MtNybhdkA9GV3UNS6BTwPcuhjXoPrSzV
Or by scanning the QR code from your wallet: