The first article touched on the RESTful API with eve in a simple way.
This article covers using mongodb to handle the REST API with mongodb; the article is based on eve's quickstart guide found on its site.
The blog articles related to mongodb are:
To view the database in mongodb I will use the robomongo (broken link) client, which you can download at the following link (broken link).
The run.py file contains the same as in the previous article:
#!/usr/bin/env python

from eve import Eve
app = Eve()

if __name__ == '__main__':
    app.run()
The settings.py file will contain some directives.
Configuration of the mongodb database:
MONGO_HOST = 'localhost'
MONGO_PORT = 27017
#MONGO_USERNAME = 'user'
#MONGO_PASSWORD = 'user'
MONGO_DBNAME = 'eve'
Since no user and password have been configured for mongodb, those lines are commented out; the database to use is called eve.
Configure all the CRUD options (read, edit, update and delete):
# Enable reads (GET), inserts (POST) and DELETE for resources/collections
# (if you omit this line, the API will default to ['GET'] and provide
# read-only access to the endpoint).
RESOURCE_METHODS = ['GET', 'POST', 'DELETE']

# Enable reads (GET), edits (PATCH), replacements (PUT) and deletes of
# individual items  (defaults to read-only item access).
ITEM_METHODS = ['GET', 'PATCH', 'PUT', 'DELETE']
A schema is defined, which allows validating the data:
schema = {
    # Schema definition, based on Cerberus grammar. Check the Cerberus project
    # (https://github.com/nicolaiarocci/cerberus) for details.
    'nombre': {
        'type': 'string',
        'minlength': 1,
        'maxlength': 10,
    },
    'apellido': {
        'type': 'string',
        'minlength': 1,
        'maxlength': 15,
        'required': True,
        # talk about hard constraints! For the purpose of the demo
        # 'lastname' is an API entry-point, so we need it to be unique.
        'unique': True,
    },
    # 'role' is a list, and can only contain values from 'allowed'.
    'role': {
        'type': 'list',
        'allowed': ["author", "contributor", "copy"],
    },
    # An embedded 'strongly-typed' dictionary.
    'localizacion': {
        'type': 'dict',
        'schema': {
            'direccion': {'type': 'string'},
            'ciudad': {'type': 'string'}
        },
    },
    'nacimiento: {
        'type': 'datetime',
    },
}
Definition of persona:
persona = {
    # 'title' tag used in item links. Defaults to the resource title minus
    # the final, plural 's' (works fine in most cases but not for 'people')
    'titulo': 'persona',

    # by default the standard item entry point is defined as
    # '/people/<ObjectId>'. We leave it untouched, and we also enable an
    # additional read-only entry point. This way consumers can also perform
    # GET requests at '/people/<lastname>'.
    'additional_lookup': {
        'url': 'regex("[\w]+")',
        'field': 'apellido'
    },

    # We choose to override global cache-control directives for this resource.
    'cache_control': 'max-age=10,must-revalidate',
    'cache_expires': 10,

    # most global settings can be overridden at resource level
    'resource_methods': ['GET', 'POST'],

    'schema': schema
}
Finally, the resource is defined as a domain; the persona resource takes the definition given above:
DOMAIN = {
    'persona': persona,
}
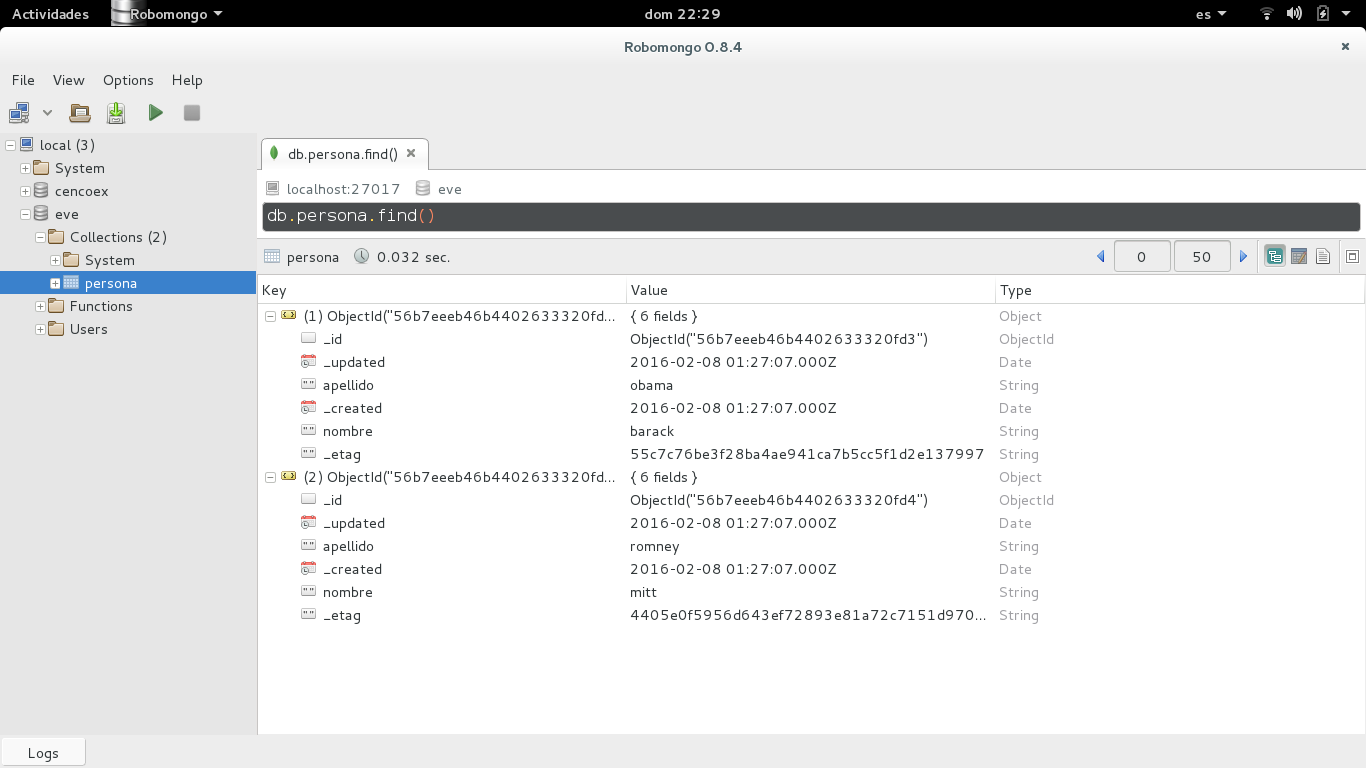
With robomongo you can see that two documents have already been added to the persona collection of the eve database:
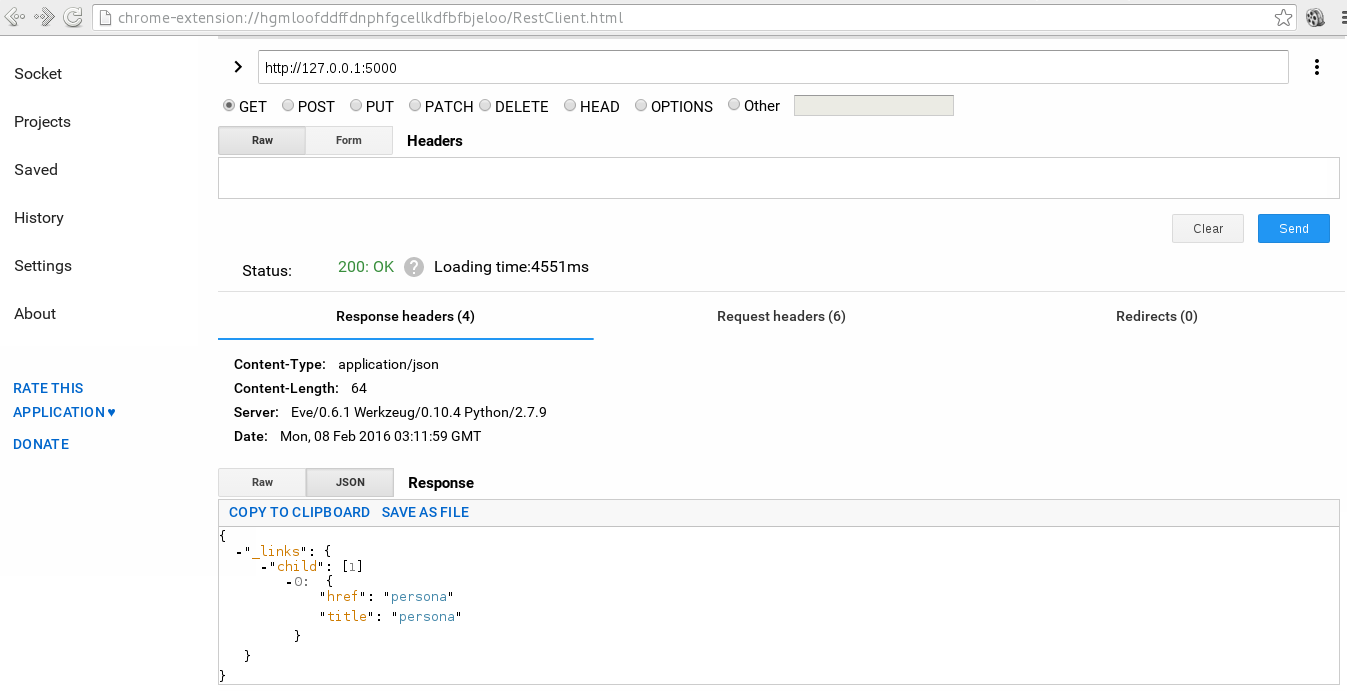
A GET query is made to http://127.0.0.1:500 using the google chrome extension restclient:
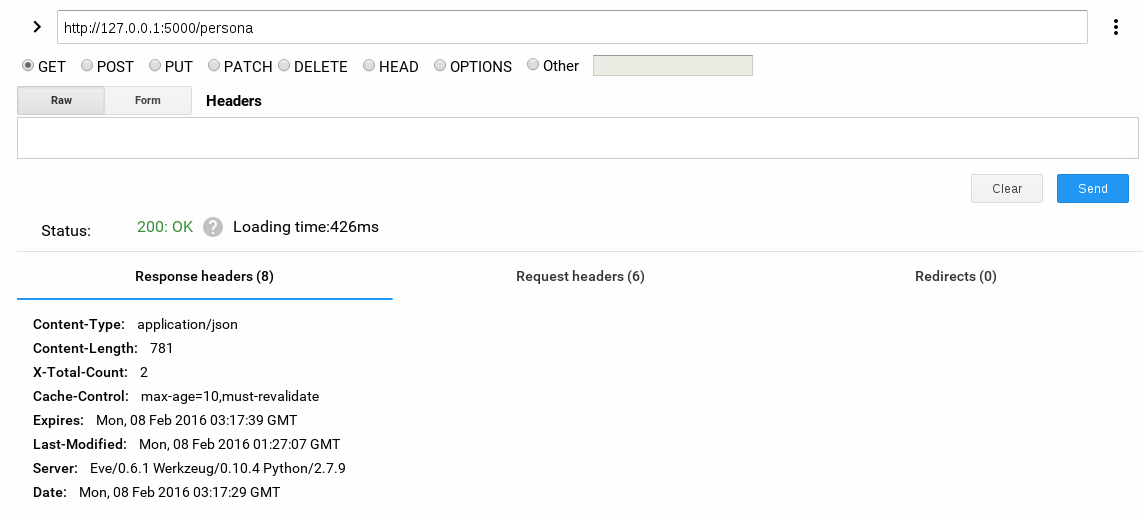
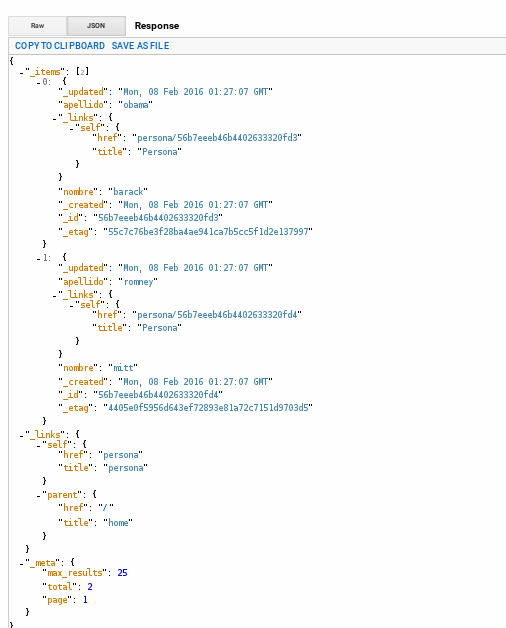
When making a GET query to http://127.0.0.1:5000/persona you get the following:
From the command line I will add two documents, using curl for it:
curl -d '[{"nombre": "Ernesto", "apellido": "Crespo"}, {"nombre": "Argimiro", "apellido": "Crespo"}]' -H 'Content-Type: application/json' http://127.0.0.1:5000/personaWhen run, it returns the following:
{
   "_status": "OK",
   "_items": [
      {
         "_updated": "Mon, 08 Feb 2016 03:34:41 GMT",
         "_links": {
            "self": {
               "href": "persona/56b80cd146b4402633320fd5",
               "title": "Persona"
            }
         },
         "_created": "Mon, 08 Feb 2016 03:34:41 GMT",
         "_status": "OK",
         "_id": "56b80cd146b4402633320fd5",
         "_etag": "cb32857db339920319adeb23b29359936c92680f"
      },
      {
         "_updated": "Mon, 08 Feb 2016 03:34:41 GMT",
         "_links": {
            "self": {
               "href": "persona/56b80cd146b4402633320fd6",
               "title": "Persona"
            }
         },
         "_created": "Mon, 08 Feb 2016 03:34:41 GMT",
         "_status": "OK",
         "_id": "56b80cd146b4402633320fd6",
         "_etag": "c14c62e94c88dd227ccffaf5c248f18492040ee2"
      }
   ]
}
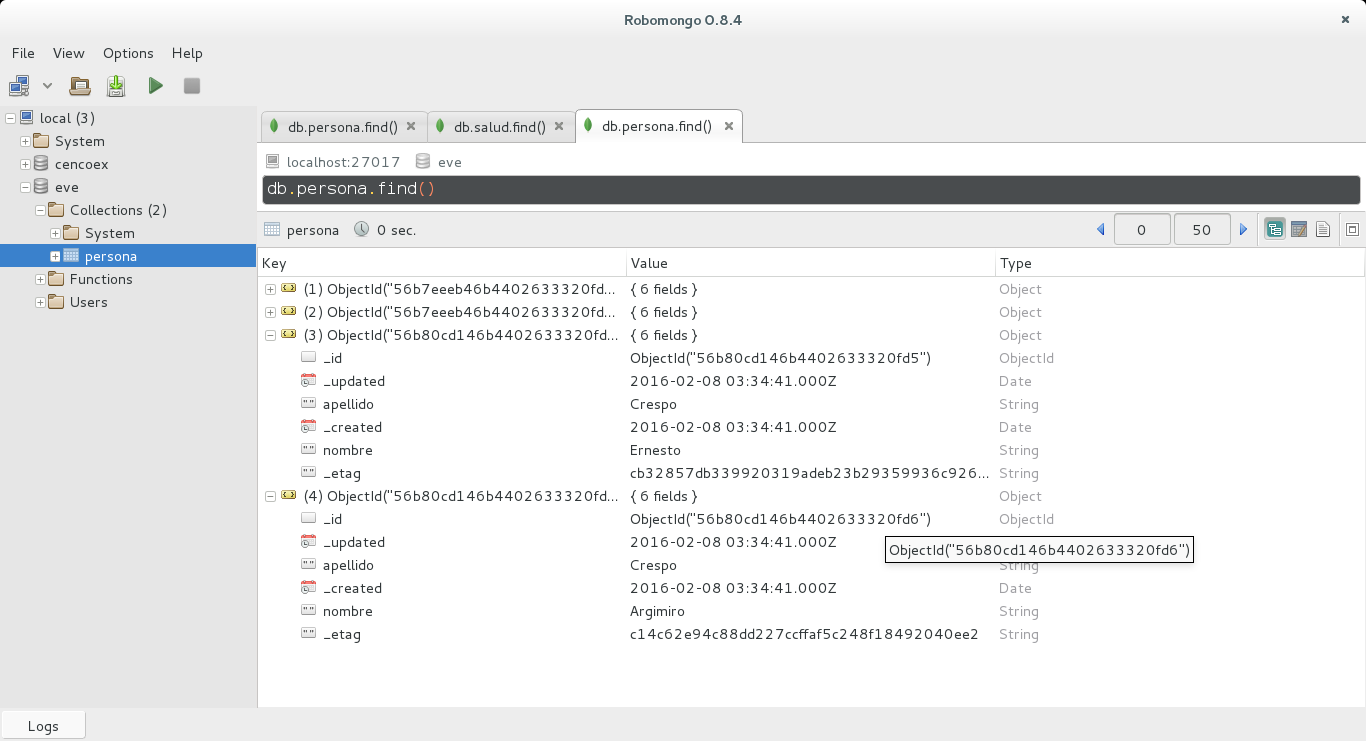
When checking the mongodb database, we see that two documents were inserted:
Make a donation! If you liked the article you can make a donation in Bitcoin (BTC) using the digital wallet of your choice to the following address: 17MtNybhdkA9GV3UNS6BTwPcuhjXoPrSzV
Or by scanning the QR code from your wallet: